
Department Management
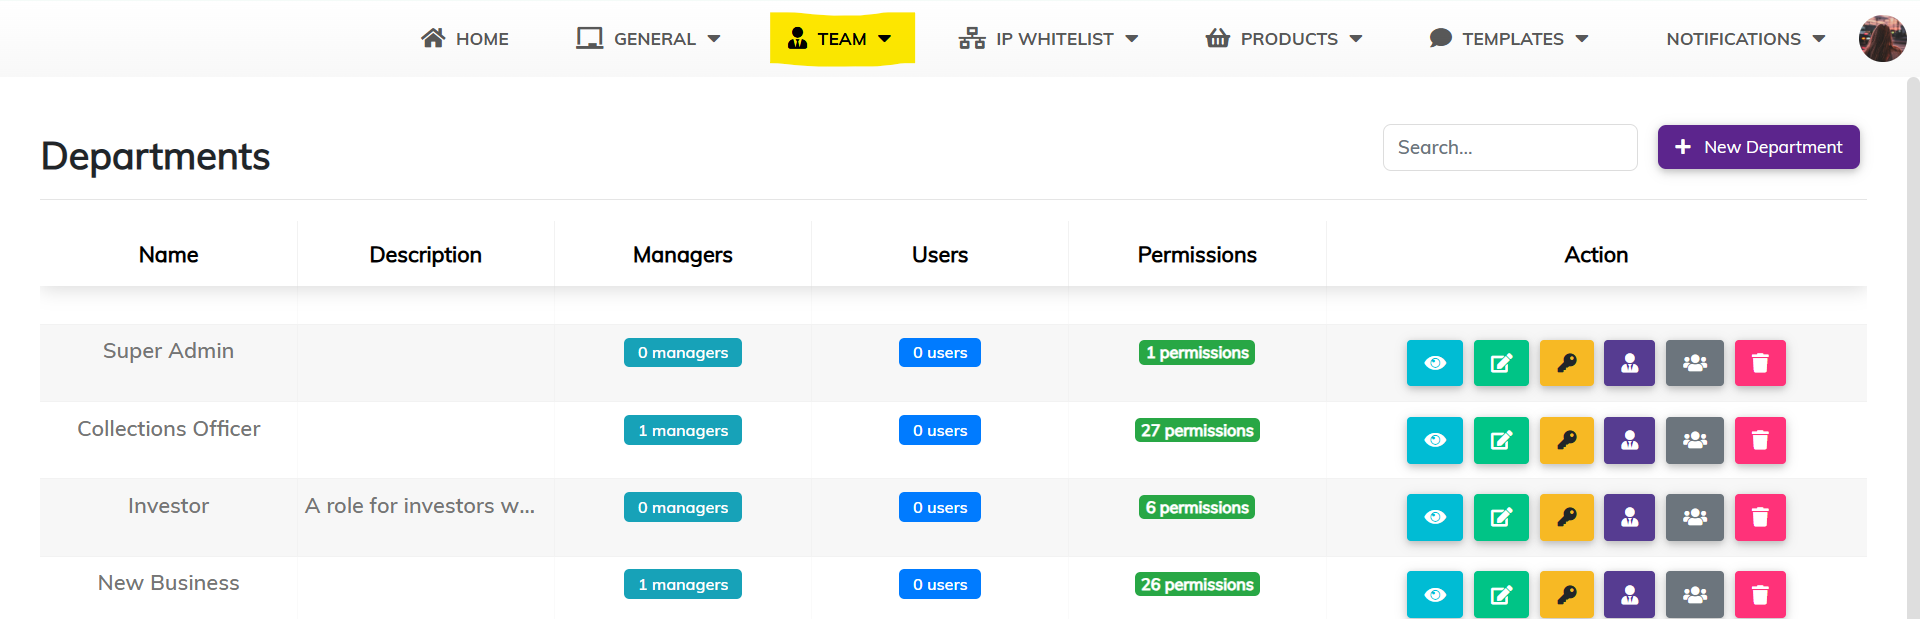
The Departments section provides a centralized view of all departments configured in the Admin Portal. It summarizes the number of managers, users, and permissions assigned to each department, allowing administrators to easily review and manage access structures within the organization.
Purpose:
- To categorize users into functional departments.
- To assign and manage permissions by group.
- To monitor team structure and access control centrally.
How to Use the Departments Section
1. Access the Departments Section
- Navigate to the top menu and click TEAM.
- Select Manage Departments from the dropdown.
2. Department Overview Table
- Each row shows:
- Name: Department name.
- Description: Department purpose (optional).
- Managers: Number of managers assigned.
- Users: Number of users assigned.
- Permissions: Number of permissions assigned.
- Actions: Available actions to manage the department.
Actions Available
Each department entry provides the following functions:
|
Icon
|
Action
|
Description
|
 |
Preview
|
View a summary of the department, including assigned managers, users, and permissions.
|
 |
Edit
|
Edit the department’s name or description.
|
 |
Permissions
|
Assign or manage permissions specific to the department.
|
 |
Manager
|
Assign or remove department managers.
|
 |
Users
|
Assign or remove users from the department.
|
 |
Delete
|
Permanently remove the department.
|
How to Add a New Department
-
Creating a Department
The Create a Department function allows administrators to establish functional groups, assign department managers, allocate users to those managers, and define access permissions for the entire department.This feature improves team structure, promotes accountability, and simplifies permission management by grouping users with similar roles.
How to Create a Department
1. Access the Create Department Page
- From the top menu, click TEAM.
- Select Create a Departments from the dropdown.
- Alternatively, click the + New Department button in the top-right of the Departments screen.

Step 1: Enter Department Information
- Fill in the following fields:
- Name – The title or function of the department (e.g. Operations, Collections).
- Description – A short summary of the department’s purpose.
- Assigned Managers – Use the search box to select one or more managers who will oversee users in this department.
- Click Assign Users To Managers to proceed.
Step 2: Assign Users to Managers
- Use the Select Manager dropdown to choose a manager.
- A list of users will appear—tick the checkboxes to assign users to that manager.
- You may assign multiple users per manager.
- Click Save once user assignments are complete.

Step 3: Define Department Permissions
After saving users, the system will take you directly to the Permissions section.- Select the permissions relevant to the department.
- These may include actions such as:
- Admin Access
- Full Power
- Approve/Close Loans
- Add/Delete Client Information
- These may include actions such as:
- You may search, add all, or remove all permissions using the options provided.
- Click Save Permissions to finalise the setup.
Note: The screen heading may incorrectly say “Roles” instead of “Departments”. This does not affect the functionality—proceed as normal.
Managing Department Details
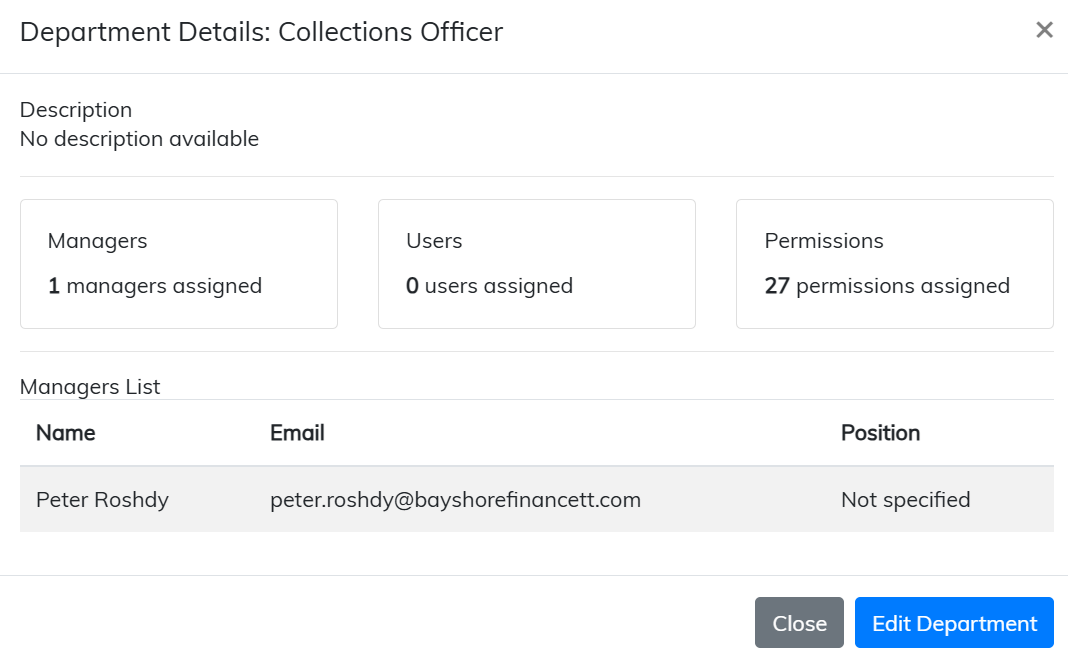
- View Summary: Click the Preview icon to open a modal showing department details.
- Edit Details: Use the Edit icon to update name or description.
- Assign Users & Managers: Use the respective icons to select which team members belong to the department.
- Assign Permissions: Click the Permissions icon to configure what the department can access.
- Delete Department: Use the Delete icon to permanently remove a department no longer in use.
Tip: Use departments to streamline permission assignment by grouping users with similar access needs.
Comments
0 comments
Please sign in to leave a comment.